Since 17.10, netplan has been the default network configuration tool in Ubuntu. Since then, it has grown in features, bug fixes, and even got its package renamed in the archive from "nplan" to netplan.io. We added better routing, improved handling for bridges, support for marking devices as "optional" for boot (so that the system doesn't wait for them to come up at boot time), lots of documentation updates... There's even been work to get it building for other distros.
We have a website for it, too: netplan.io
As we get closer to the release of Ubuntu 18.04, it is past due to involve everyone in testing netplan and making sure it is solid and as featureful as possible for a wide range of use cases.
This is where you get to participate.
Let us know about any feature gaps that remain in what
netplan supports, so that we can add the features when it's possible, or so that these feature gaps can be properly documented if they can't be closed by release time.
Report any bugs you find in netplan on Launchpad.
If you are unsure whether something is a bug, it might well be, so it doesn't hurt to file a bug. At the very least, we do want to know if something feels really difficult to do, so we can look into improving the experience.
If you're unsure how to do something you can look up questions and answers, or add your own, on AskUbuntu here:
https://askubuntu.com/questions/tagged/netplan
Netplan is being actively developed and we can use your help; so if there's one feature you care deeply about, or a bug that bugs you and you want to have a hand in fixing it, you can also jump right in to the code in Github: http://github.com/CanonicalLtd/netplan
Showing posts with label free software. Show all posts
Showing posts with label free software. Show all posts
Thursday, 15 March 2018

Wednesday, 7 March 2018
Backing up GPG keys
Using PGP/GPG keys for a long period of time (either expiring keys, or extending expiration dates) and the potential for travel, for hardware to fail, or for life's other events means that eventually rather than potentially, you will end up in a situation where a key is lost, damaged, or where you otherwise need to proceed with some disaster recovery techniques.
These techniques could be as simple as forgetting about the key altogether and letting it live forever on the Internet, without being used. It could also be that you were clever and saved a revocation certificate somewhere different than your private key is backed up, but what if you didn't?
What if you did not print the revocation certificate? Or you just really don't feel very much like re-typing half a gazillion character?
I wouldn't wish it to anyone, but there will always be the risk of a failure of your "backup options"; so I'm sharing here my personal backup methods.
I back up my GPG keys, which I use both at and outside of work, on multiple different media:
This retains the same security systems as your original key. You should have added a passphrase to it anyway, so even if the paper copy was found and used to recover the key, you would be protected by the complexity of your passphrase.
But this depends on OCR working correctly, especially on an aging medium such as paper, or you spending many hours re-typing the contents, and potentially tracking down typos. There's error correction, but that sounds to me like not fun at all. When you want to recover your key, presumably it is because you really do need it as soon as possible.
Back in 2015 when I generated my latest keys, I found a blog post that explained how to use QR codes to back up data. QR codes have the benefit of being very resilient to corruption, and above all, do not require typing. QR codes are however limited in size, being limited to 177x177 squares, for about 1200 characters storage.
Along with that blog post, I also found out about DataMatrix codes (which are quite similar to QR codes), but where each symbol can save a bit more data (about 1500 bytes per image in the biggest size). Pick the format you prefer, I picked DataMatrix. Simply modify the size you split to in the commands below.
One might wish to save the paperkey or the private key directly (obviously, saving the private key might mean more chunks to print), and that can be done using the programs in dmtx-utils:
You will be left with multiple parts of the file you originally split (without a file extension), as well as a corresponding image in PNG format that can be printed, and later scanned, to recover the original.
Keep these in a safe location and your key should be recoverable years down the line. It's not a bad idea to "pretend" there's a catastrophe and attempt to recover your key every few months, just to be sure you can go through the steps easily and that the paper keys are in good shape.
Recovery is simple:
If all went well, the original and recovered files should be identical, and you just avoided a couple of hours of typing.
Stay safe!
These techniques could be as simple as forgetting about the key altogether and letting it live forever on the Internet, without being used. It could also be that you were clever and saved a revocation certificate somewhere different than your private key is backed up, but what if you didn't?
What if you did not print the revocation certificate? Or you just really don't feel very much like re-typing half a gazillion character?
I wouldn't wish it to anyone, but there will always be the risk of a failure of your "backup options"; so I'm sharing here my personal backup methods.
I back up my GPG keys, which I use both at and outside of work, on multiple different media:
- "Daily use" happens using a Yubikey that holds securely the private part of the keys (it can't be extracted from the smartcard), as well as the public part. I've already written about this two years ago, on this blog.
- The first layer of backup is on a LUKS-encrypted USB key. The USB key must obviously be encrypted to block out most attempts at accessing the contents of the key; and it is a key that I usually carry on my person at all times, like the Yubikeys -- I also use it to back up other files I can't leave without, such as a password vault, some other certificates, copies of ID documents in case of loss for when I travel, etc.
- The next layer is on paper. Well, cardstock actually, to avoid wanting to fold it. This is the process I want to dig into deeper here.
It turns out that backing up secure keys on paper is pretty straightforward, and something just fine to do. You will obviously want to keep the paper copies in a secure location that only you have access to, as much as possible safe from fire (or at least somewhere unlikely to burn down at the same time as you'd lose the other backups).
paperkey is a generally accepted way of saving the private part of your GPG key. It does a decent job at saving things in a printable form, from which point you would go ahead and re-type, or use OCR to recover the text generated by paperkey:
paperkey --secret-key secret.gpg --output printme.txt
This retains the same security systems as your original key. You should have added a passphrase to it anyway, so even if the paper copy was found and used to recover the key, you would be protected by the complexity of your passphrase.
But this depends on OCR working correctly, especially on an aging medium such as paper, or you spending many hours re-typing the contents, and potentially tracking down typos. There's error correction, but that sounds to me like not fun at all. When you want to recover your key, presumably it is because you really do need it as soon as possible.
Back in 2015 when I generated my latest keys, I found a blog post that explained how to use QR codes to back up data. QR codes have the benefit of being very resilient to corruption, and above all, do not require typing. QR codes are however limited in size, being limited to 177x177 squares, for about 1200 characters storage.
Along with that blog post, I also found out about DataMatrix codes (which are quite similar to QR codes), but where each symbol can save a bit more data (about 1500 bytes per image in the biggest size). Pick the format you prefer, I picked DataMatrix. Simply modify the size you split to in the commands below.
One might wish to save the paperkey or the private key directly (obviously, saving the private key might mean more chunks to print), and that can be done using the programs in dmtx-utils:
cat printme.txt | split -b 1500 - part-
rm printme.txt
for part in part-*; do
dmtxwrite -e 8 ${part} > ${part}.png
done
You will be left with multiple parts of the file you originally split (without a file extension), as well as a corresponding image in PNG format that can be printed, and later scanned, to recover the original.
Keep these in a safe location and your key should be recoverable years down the line. It's not a bad idea to "pretend" there's a catastrophe and attempt to recover your key every few months, just to be sure you can go through the steps easily and that the paper keys are in good shape.
Recovery is simple:
for file in *.png; do dmtxread $file >> printme.txt; done
If all went well, the original and recovered files should be identical, and you just avoided a couple of hours of typing.
Stay safe!
Tuesday, 20 June 2017
Netplan by default in 17.10
Friday, I uploaded an updated nplan package (version 0.24) to change its Priority: field to important, as well as an update of ubuntu-meta (following a seeds update), to replace ifupdown with nplan in the minimal seed.
What this means concretely is that nplan should now be installed by default on all images, part of ubuntu-minimal, and dropped ifupdown at the same time.
For the time being, ifupdown is still installed by default due the way debootstrap generates the very minimal images used as a base for other images -- how it generates its base set of packages, since that depends only on the Priority: field of packages. Thus, nplan was added, but ifupdown still needs to be changed (which I will do shortly) to disappear from all images.
The intent is that nplan would now be the standard way of configuring networks. I've also sent an email about this to ubuntu-devel-announce@.
I've already written a bit about what netplan is and does, and I have still more to write on the subject (discussing syntax and how to do common things). We especially like how using a purely declarative syntax makes things easier for everyone (and if you can't do what you want that way, then it's a bug you should report).
MaaS, cloud-init and others have already started to support writing netplan configuration.
The full specification (summary wiki page and a blueprint reachable from it) for the migration process is available here.
While I get to writing something comprehensive about how to use the netplan YAML to configure networks, if you want to know more there's always the manpage, which is the easiest to use documentation. It should always be up to date with the current version of netplan available on your release (since we backported the last version to Xenial, Yakkety, and Zesty), and accessible via:
To make things "easy" however, you can also check out the netplan documentation directly from the source tree here:
https://git.launchpad.net/netplan/tree/doc/netplan.md
There's also a wiki page I started to get ready that links to the most useful things, such as an overview of the design of netplan, some discussion on the renderers we support and some of the commands that can be used.
We even have an IRC channel on Freenode: #netplan
I think you'll find that using netplan makes configuring networks easy and even enjoyable; but if you run into an issue, be sure to file a bug on Launchpad here:
What this means concretely is that nplan should now be installed by default on all images, part of ubuntu-minimal, and dropped ifupdown at the same time.
For the time being, ifupdown is still installed by default due the way debootstrap generates the very minimal images used as a base for other images -- how it generates its base set of packages, since that depends only on the Priority: field of packages. Thus, nplan was added, but ifupdown still needs to be changed (which I will do shortly) to disappear from all images.
The intent is that nplan would now be the standard way of configuring networks. I've also sent an email about this to ubuntu-devel-announce@.
I've already written a bit about what netplan is and does, and I have still more to write on the subject (discussing syntax and how to do common things). We especially like how using a purely declarative syntax makes things easier for everyone (and if you can't do what you want that way, then it's a bug you should report).
MaaS, cloud-init and others have already started to support writing netplan configuration.
The full specification (summary wiki page and a blueprint reachable from it) for the migration process is available here.
While I get to writing something comprehensive about how to use the netplan YAML to configure networks, if you want to know more there's always the manpage, which is the easiest to use documentation. It should always be up to date with the current version of netplan available on your release (since we backported the last version to Xenial, Yakkety, and Zesty), and accessible via:
man 5 netplan
To make things "easy" however, you can also check out the netplan documentation directly from the source tree here:
https://git.launchpad.net/netplan/tree/doc/netplan.md
There's also a wiki page I started to get ready that links to the most useful things, such as an overview of the design of netplan, some discussion on the renderers we support and some of the commands that can be used.
We even have an IRC channel on Freenode: #netplan
I think you'll find that using netplan makes configuring networks easy and even enjoyable; but if you run into an issue, be sure to file a bug on Launchpad here:
Wednesday, 24 May 2017
An overview of UEFI Secure Boot on Ubuntu
Secure Boot is here
Ubuntu has now supported UEFI booting and Secure Boot for long enough that it is available, and reasonably up to date, on all supported releases. Here is how Secure Boot works.An overview
I'm including a diagram here; I know it's a little complicated, so I will also explain how things happen (it can be clicked to get to the full size image).
In all cases, booting a system in UEFI mode loads UEFI firmware, which typically contains pre-loaded keys (at least, on x86). These keys are usually those from Microsoft so that Windows can load its own bootloader and verify it, as well as those from the computer manufacturer. The firmware doesn't, by itself, know anything special about how to boot the system -- this is something that is informed by NVRAM (or some similar memory that survives a reboot) by way of a few variables: BootOrder, which specified what order to boot things in, as well as BootEntry#### (hex numbers), which contains the path to the EFI image to load, a disk, or some other method of starting the computer (such as booting in the Setup tool for that firmware). If no BootEntry variable listed in BootOrder gets the system booting, then nothing would happen. Systems however will usually at least include a path to a disk as a permanent or default BootEntry. Shim relies on that, or on a distro, to load in the first place.
Once we actually find shim to boot; this will try to validate signatures of the next piece in the puzzle: grub2, MokManager, or fallback, depending on the state of shim's own variables in NVRAM; more on this later.
In the usual scenario, shim will validate the grub2 image successfully, then grub2 itself will try to load the kernel or chainload another EFI binary, after attempting to validate the signatures on these images by way of asking shim to check the signature.
Shim
Shim is just a very simple layer that holds on to keys outside of those installed by default on the system (since they normally can't be changed outside of Setup Mode, and require a few steps to do), and knows how to load grub2 in the normal case, as well as how to load MokManager if policy changes need to be applied (such as disabling signature validation or adding new keys), as well as knowing how to load the fallback binary which can re-create BootEntry variables in case the firmware isn't able to handle them. I will expand on MokManager and fallback in a future blog post.
Your diagram says shim is signed by Microsoft, what's up with that?
Indeed, shim is an EFI binary that is signed by Microsoft how we ship it in Ubuntu. Other distributions do the same. This is required because the firmware on most systems already contains Microsoft certificates (pre-loaded in the factory), and it would be impractical to have different shims for each manufacturer of hardware. All EFI binaries can be easily re-signed anyway, we just do things like this to make it as easy as possible for the largest number of people.
One thing this means is that uploads of shim require a lot of effort and testing. Fortunately, since it is used by other distributions too, it is a well-tested piece of code. There is even now a community process to handle review of submissions for signature by Microsoft, in an effort to catch anything outlandish as quickly and as early as possible.
Why reboot once a policy change is made or boot entries are rebuilt?
All of this happens through changes in firmware variables. Rebooting makes sure we can properly take into account changes in the firmware variables, and possibly carry on with other "backlogged" actions that need to happen (for instance, rebuilding BootEntry variables first, and then loading MokManager to add a new signing key before we can load a new grub2 image you signed yourself).
Grub2
grub2 is not a new piece of the boot process in any way. It's been around for a long while. The difference from booting in BIOS mode compared to in UEFI is that we install an UEFI binary version of grub2. The software is the same, just packaged slightly differently (I may outline the UEFI binary format at some point in the future). It also goes through some code paths that are specific to UEFI, such as checking if we've booting through shim, and if so, asking it to validate signatures. If not, we can still validate signatures, but we would have to do so using the UEFI protocol itself, which is limited to allowing signatures by keys that are included in the firmware, as expressed earlier. Mostly just the Microsoft signatures.
grub2 in UEFI otherwise works just like it would elsewhere: it try to find its grub.cfg configuration file, and follow its instructions to boot the kernel and load the initramfs.
When Secure Boot is enabled, loading the kernel normally requires that the kernel itself is signed. The kernels we install in Ubuntu are signed by Canonical, just like grub2 is, and shim knows about the signing key and can validate these signatures.
At the time of this writing, if the kernel isn't signed or is signed by a key that isn't known, grub2 will fall back to loading the kernel as a normal binary (as in not signed), outside of BootServices (a special mode we're in while booting the system, normally it's exited by the kernel early on as the kernel loads). Exiting BootServices means some special features of the firmware are not available to anything that runs afterwards, so that while things may have been loaded in UEFI mode, they will not have access to everything in firmware. If the kernel is signed correctly, then grub2 leaves the ExitBootServices call to be done by the kernel.
Very soon, we will stop allowing to load unsigned (or signed by unknown keys) kernels in Ubuntu. This is work in progress. This change will not affect most users, only those who build their own kernels. In this case, they will still be able to load kernels by making sure they are signed by some key (such as their own, and I will cover signing things in my next blog entry), and importing that key in shim (which is a step you only need to do once).
The kernel
In UEFI, the kernel enforces that modules loaded are properly signed. This means that for those who need to build their own custom modules, or use DKMS modules (virtualbox, r8168, bbswitch, etc.), you need to take more steps to let the modules load properly.
In order to make this as easy as possible for people, for now we've opted to let users disable Secure Boot validation in shim via a semi-automatic process. Shim is still being verified by the system firmware, but any piece following it that asks shim to validate something will get an affirmative response (ie. things are valid, even if not signed or signed by an unknown key). grub2 will happily load your kernel, and your kernel will be happy to load custom modules. This is obviously not a perfectly secure solution, more of a temporary measure to allow things to carry on as they did before. In the future, we'll replace this with a wizard-type tool to let users sign their own modules easily. For now, signature of binaries and modules is a manual process (as above, I will expand on it in a future blog entry).
Shim validation
To toggle shim validation, if you were using DKMS packages and feel you'd really prefer to have shim validate everything (but be aware that if your system requires these drivers, they will not load and your system may be unusable, or at least whatever needs that driver will not work):
sudo update-secureboot-policy --enableIf nothing happens, it's because you already have shim validation enabled: nothing has required that it be disabled. If things aren't as they should be (for instance, Secure Boot is not enabled on the system), the command will tell you.
And although we certainly don't recommend it, you can disable shim validation yourself with much the same command (see --help). There is an example of use of update-secureboot-policy here.
Tuesday, 23 May 2017
ss: another way to get socket statistics
In my last blog post I mentioned ss, another tool that comes with the iproute2 package and allows you to query statistics about sockets. The same thing that can be done with netstat, with the added benefit that it is typically a little bit faster, and shorter to type.
Just ss by default will display much the same thing as netstat, and can be similarly passed options to limit the output to just what you want. For instance:
ss -t shows just TCP connections. ss -u can be used to show UDP connections, -l will show only listening ports, and things can be further filtered to just the information you want.
I have not tested all the possible options, but you can even forcibly close sockets with -K.
One place where ss really shines though is in its filtering capabilities. Let's list all connections with a source port of 22 (ssh):
Similarly, you can have it list all connections to a specific host or range; in this case, using the 74.125.0.0/16 subnet, which apparently belongs to Google:
Try it for yourself! You'll see how well it works. If anything, I'm glad for the fewer characters this makes me type.
Just ss by default will display much the same thing as netstat, and can be similarly passed options to limit the output to just what you want. For instance:
$ ss -t[...]
State Recv-Q Send-Q Local Address:Port Peer Address:Port
ESTAB 0 0 127.0.0.1:postgresql 127.0.0.1:48154
ESTAB 0 0 192.168.0.136:35296 192.168.0.120:8009
ESTAB 0 0 192.168.0.136:47574 173.194.74.189:https
ss -t shows just TCP connections. ss -u can be used to show UDP connections, -l will show only listening ports, and things can be further filtered to just the information you want.
I have not tested all the possible options, but you can even forcibly close sockets with -K.
One place where ss really shines though is in its filtering capabilities. Let's list all connections with a source port of 22 (ssh):
$ ss state all sport = :sshAnd if I want to show only connected sockets (everything but listening or closed):
Netid State Recv-Q Send-Q Local Address:Port Peer Address:Port
tcp LISTEN 0 128 *:ssh *:*
tcp ESTAB 0 0 192.168.0.136:ssh 192.168.0.102:46540
tcp LISTEN 0 128 :::ssh :::*
$ ss state connected sport = :ssh
Netid State Recv-Q Send-Q Local Address:Port Peer Address:Port
tcp ESTAB 0 0 192.168.0.136:ssh 192.168.0.102:46540
Similarly, you can have it list all connections to a specific host or range; in this case, using the 74.125.0.0/16 subnet, which apparently belongs to Google:
$ ss state all dst 74.125.0.0/16This is very much the same syntax as for iptables, so if you're familiar with that already, it will be quite easy to pick up. You can also install the iproute2-doc package, and look in /usr/share/doc/iproute2-doc/ss.html for the full documentation.
Netid State Recv-Q Send-Q Local Address:Port Peer Address:Port
tcp ESTAB 0 0 192.168.0.136:33616 74.125.142.189:https
tcp ESTAB 0 0 192.168.0.136:42034 74.125.70.189:https
tcp ESTAB 0 0 192.168.0.136:57408 74.125.202.189:https
Try it for yourself! You'll see how well it works. If anything, I'm glad for the fewer characters this makes me type.
Tuesday, 9 May 2017
If you're still using ifconfig, you're living in the past
The world evolves
I regularly see "recommendations" to use ifconfig to get interface information in mailing list posts or bug reports and other places. I might even be guilty of it myself. Still, the world of networking has evolved quite a lot since ifconfig was the de-facto standard to bring up a device, check its IP or set an IP.Following some improvements in the kernel and the gradual move to driving network things via netlink; ifconfig has been largely replaced by the ip command.
Running just ip yields the following:
Usage: ip [ OPTIONS ] OBJECT { COMMAND | help }
ip [ -force ] -batch filename
where OBJECT := { link | address | addrlabel | route | rule | neigh | ntable |
tunnel | tuntap | maddress | mroute | mrule | monitor | xfrm |
netns | l2tp | fou | macsec | tcp_metrics | token | netconf | ila }
OPTIONS := { -V[ersion] | -s[tatistics] | -d[etails] | -r[esolve] |
-h[uman-readable] | -iec |
-f[amily] { inet | inet6 | ipx | dnet | mpls | bridge | link } |
-4 | -6 | -I | -D | -B | -0 |
-l[oops] { maximum-addr-flush-attempts } | -br[ief] |
-o[neline] | -t[imestamp] | -ts[hort] | -b[atch] [filename] |
-rc[vbuf] [size] | -n[etns] name | -a[ll] | -c[olor]}
I understand this may look complicated to some people, but the jist of it is to understand that with ip, you interact with objects, and apply some kind of function to it. For example:
ip address show
This is the main command that would be used in place of ifconfig. It will just display the IP addresses assigned to all interfaces. To be precise, it will show you the layer 3 details the interface: the IPv4 and IPv6 addresses, whether it is up, what are the different properties related to the addresses...
Another command will give you details about the layer 2 properties of the interface: its MAC address (ethernet address), etc; even if it is shown by ip address:
ip link show
Furthermore, you can set devices up or down (similar to ifconfig eth0 up or ifconfig eth0 down) simply by using:
ip link set DEVICE up or ip link set DEVICE down
As shown above, there are lots of other objects that can be interacted with using the ip command. I'll cover another: ip route, in another post.
Why is this important?
As time passes, more and more features are becoming easier to use with the ip command instead of with ifconfig. We've already stopped installing ifconfig on desktops (it still gets installed on servers for now), and people have been discussing dropping net-tools (the package that ships ifconfig and a few other old commands that are replaced) for a while now. It may be time to revisit not installing net-tools by default anywhere.
I want to know about your world
Are you still using one of the following tools?
/bin/netstat (replaced by ss, for which I'll dedicate another blog post entirely)
/sbin/ifconfig
/sbin/ipmaddr (replaced by ip maddress)
/sbin/iptunnel
/sbin/mii-tool (ethtool should appropriately replace it)
/sbin/nameif
/sbin/plipconfig
/sbin/rarp
/sbin/route
/sbin/slattach
If so and there is just no alternative to using them that comes from iproute2 (well, the ip or ss commands) that you can use to do the same, I want to know about how you are using them. We're always watching for things that might be broken by changes; we want to avoid breaking things when possible.
Friday, 15 January 2016
In full tinfoil hat mode: Using GPG with smartcards
Breaking OPSEC for a bit to write a how-to on using GPG keys with smartcards...
I've thought about experimenting with smartcards for a while. Turns out that my Thinkpad has a built-in smartcard reader, but most of my other systems don't. Also, I'd like to use a smartcard to protect my SSH keys, some of which I may use on systems that I do not fully control (ie. at the university to push code to Github or Bitbucket), or to get to my server. Smartcard readers are great, but they're not much fun to add to a list of stuff to carry everywhere.
There's an alternate option: the Yubikey. Yubico appears to have made a version 4 of the Yubikey which has CCID (smartcard magic), U2F (2-factor for GitHub and Google, on Chrome), and their usual OTP token, all on the same tiny USB key. What's more, it is documented as supporting 4096 bit RSA keys, and includes some ECC support (more on this later).
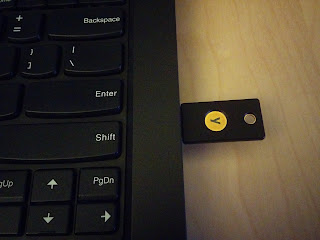 Setting up GPG keys for use with smartcards is simple. One has the choice of either creating your own keys locally, and moving them on the smartcard, or generating them on the smartcard right away. In other to have a backup of my full key available in a secure location, I've opted to generate the keys off of the card, and transferring them.
For this, you will need one (or two) Yubikey 4 (or Yubikey 4 Nano, or if you don't mind being limited to 2048 bit keys, the Yubikey NEO, which can also do NFC), some backup media of your choice, and apparently, at least the following packages:
You should do all of this on a trusted system, not connected to any network.
First, setup gnupg2 to a reasonable level of security. Edit ~/.gnupg/gpg.conf to pick the options you want, I've based my config on Jeffrey Clement's blog entry on the subject:
The downside to all of this is that you'll need to use gpg2 in all cases rather than gpg; which is still the default on Ubuntu and Debian. gpg2 so far seems to work just fine for ever use I've had (including debsign, after setting DEBSIGN_PROGRAM=gpg2 in ~/.devscripts).
You can now generate your master key:
Then edit the key to add new UIDs (identities) and subkeys, which will each have their own different capabilities:
Add the subkeys. You should have one of encryption, one for signing, and one for authentication. Works out pretty well, since there are three slots, one for each of these capabilities, on the Yubikey.
If you also want your master key on a smartcard, you'll probably need a second Yubikey (that's why I wrote two earlier), which would only get used to sign other people's keys, extend expiration dates, generate new subkeys, etc. That one should be left in a very secure location.
This is a great point to backup all the keys you've just created:
Next step is to configure the smartcard/Yubikey to add your name, a URL for the public key, set the PINs, etc. Use the following command for this:
Finally, go back to editing your GPG key:
From this point you can use toggle to select each subkey (using key #), move them to the smartcard (keytocard), and deselect them (key #). To move the master key to the card, "toggle" out of toggle mode then back in, then immediately run 'keytocard'. GPG will ask if you're certain. There is no way to get a key back out of the card, if you want a local copy, you needed to make a backup first.
Now's probably a great time to copy your key to a keyserver, so that people may eventually start to use it to send you encrypted mail, etc.
After transferring the keys, you may want to make a "second backup", which would only contain the "clues" for GPG to know on which smartcard to find the private part of your keys. This will be useful if you need to use the keys on another system.
Another option is to use the public portion of your key (saved somewhere, like on a keyserver), then have gpg2 discover that it's on a smartcard using:
Unfortunately, it appears to only manage to pick up either only the master key, or only the subkeys, if you use separate smartcards. This may be a blessing in disguise, in that you'd still only use the master key on an offline, very secure system, and only the subkeys in your typical daily use scenario.
Don't forget to generate a revocation certificate. This is essential if you ever lose your key, if it's compromised, or you're ever in a situation where you want to let the world know quickly not to use your key anymore:
Finally, more on backing up the GPG keys. It could be argued that keeping your master key on a smartcard might be a bad idea. After all, if the smartcard is lost, while it would be difficult to get the key out of the smartcard, you would probably want to treat it as compromised and get the key revoked. The same applies to keys kept on USB drives or on CD. A strong passphrase will help, but you still lost control of your key and at that point, no longer know whether it is still safe.
What's more, USB drives and CDs tend to eventually fail. CDs rot after a number of years, and USB drives just seem to not want to work correctly when you really need them. Paper is another option for backing up your keys, since there are ways (paperkey, for instance) to represent the data in a way that it could either be retyped or scanned back into digital data to be retrieved. Further securing a backup key could involve using gfshare to split it into multiple bits, in the hope that while one of its locations could be compromised (lost), you'll still have some of the others sufficient to reconstruct the key.
With the subkeys on the Yubikey, and provided gpg2 --card-status reports your card as detected, if you have the gpg-agent running with SSH support enabled you should be able to just run:
And have it list your card serial number. You can then use ssh-add -L to get the public key to use to add to authorized_keys files to use your authentication GPG subkey as a SSH key. If it doesn't work, make sure the gpg-agent is running and that ssh-add uses the right socket, and make sure pcscd isn't interfering (it seemed to get stuck in a weird state, and not shutting down automatically as it should after dealing with a request).
Whenever you try to use one of the subkeys (or the master key), rather than being asked for the passphrase for the key (which you should have set as a very difficult, absolutely unguessable string that you and only you could remember and think of), you will be asked to enter the User PIN set for the smartcard.
You've achieved proper two-factor authentication.
Note of ECC on the Yubikey: according to the marketing documentation, the Yubikey knows about ECC p256 and ECC p384. Unfortunately, it looks like safecurves.cr.yp.to considers these unsafe, since they do not meet all the SafeCurves requirements. I'm not especially versed in cryptography, but this means I'll read up more on the subject, and stay away from the ECC implementation on the Yubikey 4 for now. However, it doesn't seem, at first glace, that this ECC implementation is meant for GPG at all. The Yubikey also has PIV magic which would allow it to be used as a pure SSH smartcard (rather than using a GPG authentication subkey for SSH), with a private certificate being generated by the card. These certificates could be created using RSA or ECC. I tried to play a bit with it (using RSA), following the SSH with PIV and PKCS11 document on developers.yubico.com; but I didn't manage to make it work. It looks like the GPG functions might interfere with PIV in some way or I could just not handle the ssh-agent the right way. I'm happy to be shown how to use this correctly.
I've thought about experimenting with smartcards for a while. Turns out that my Thinkpad has a built-in smartcard reader, but most of my other systems don't. Also, I'd like to use a smartcard to protect my SSH keys, some of which I may use on systems that I do not fully control (ie. at the university to push code to Github or Bitbucket), or to get to my server. Smartcard readers are great, but they're not much fun to add to a list of stuff to carry everywhere.
There's an alternate option: the Yubikey. Yubico appears to have made a version 4 of the Yubikey which has CCID (smartcard magic), U2F (2-factor for GitHub and Google, on Chrome), and their usual OTP token, all on the same tiny USB key. What's more, it is documented as supporting 4096 bit RSA keys, and includes some ECC support (more on this later).
 Setting up GPG keys for use with smartcards is simple. One has the choice of either creating your own keys locally, and moving them on the smartcard, or generating them on the smartcard right away. In other to have a backup of my full key available in a secure location, I've opted to generate the keys off of the card, and transferring them.
For this, you will need one (or two) Yubikey 4 (or Yubikey 4 Nano, or if you don't mind being limited to 2048 bit keys, the Yubikey NEO, which can also do NFC), some backup media of your choice, and apparently, at least the following packages:
gnupg2 gnupg-agent libpth20 libccid pcscd scdaemon libksba8 opensc
You should do all of this on a trusted system, not connected to any network.
First, setup gnupg2 to a reasonable level of security. Edit ~/.gnupg/gpg.conf to pick the options you want, I've based my config on Jeffrey Clement's blog entry on the subject:
#default-key AABBCC90DEADBEEF

keyserver hkp://keyserver.ubuntu.com

no-emit-version

no-comments

keyid-format 0xlong

with-fingerprint

use-agent

personal-cipher-preferences AES256 AES192 AES CAST5

personal-digest-preferences SHA512 SHA384 SHA256 SHA224

cert-digest-algo SHA512

default-preference-list SHA512 SHA384 SHA256 SHA224 AES256 AES192 AES CAST5 ZLIB BZIP2 ZIP Uncompressed
You'll want to replace default-key later with the key you've created, and uncomment the line.The downside to all of this is that you'll need to use gpg2 in all cases rather than gpg; which is still the default on Ubuntu and Debian. gpg2 so far seems to work just fine for ever use I've had (including debsign, after setting DEBSIGN_PROGRAM=gpg2 in ~/.devscripts).
You can now generate your master key:
gpg2 --gen-key
Then edit the key to add new UIDs (identities) and subkeys, which will each have their own different capabilities:
gpg2 --expert --edit-key 0xAABBCC90DEADBEEF
Best is to follow jclement's blog entry for this. There is no point in reiterating all of it. There's also a pretty complete guide from The Linux Foundation IT here, though it seems to include a lot of stuff that does not appear to be required here on my system, in xenial.Add the subkeys. You should have one of encryption, one for signing, and one for authentication. Works out pretty well, since there are three slots, one for each of these capabilities, on the Yubikey.
If you also want your master key on a smartcard, you'll probably need a second Yubikey (that's why I wrote two earlier), which would only get used to sign other people's keys, extend expiration dates, generate new subkeys, etc. That one should be left in a very secure location.
This is a great point to backup all the keys you've just created:
gpg2 -a --export-secret-keys 0xAABBCC90DEADBEEF > 0xAABBCC90DEADBEEF.master.key

gpg2 -a --export-secret-subkeys 0xAABBCC90DEADBEEF > 0xAABBCC90DEADBEEF.sub.key

gpg2 -a --export 0xAABBCC90DEADBEEF > 0xAABBCC90DEADBEEF.pub
Next step is to configure the smartcard/Yubikey to add your name, a URL for the public key, set the PINs, etc. Use the following command for this:
gpg2 --card-edit
Finally, go back to editing your GPG key:
gpg2 --expert --edit-key 0xAABBCC90DEADBEEF
From this point you can use toggle to select each subkey (using key #), move them to the smartcard (keytocard), and deselect them (key #). To move the master key to the card, "toggle" out of toggle mode then back in, then immediately run 'keytocard'. GPG will ask if you're certain. There is no way to get a key back out of the card, if you want a local copy, you needed to make a backup first.
Now's probably a great time to copy your key to a keyserver, so that people may eventually start to use it to send you encrypted mail, etc.
After transferring the keys, you may want to make a "second backup", which would only contain the "clues" for GPG to know on which smartcard to find the private part of your keys. This will be useful if you need to use the keys on another system.
Another option is to use the public portion of your key (saved somewhere, like on a keyserver), then have gpg2 discover that it's on a smartcard using:
gpg2 --card-status
Unfortunately, it appears to only manage to pick up either only the master key, or only the subkeys, if you use separate smartcards. This may be a blessing in disguise, in that you'd still only use the master key on an offline, very secure system, and only the subkeys in your typical daily use scenario.
Don't forget to generate a revocation certificate. This is essential if you ever lose your key, if it's compromised, or you're ever in a situation where you want to let the world know quickly not to use your key anymore:
gpg2 --gen-revoke 0xAABBCC90DEADBEEF
Store that data in a safe place.Finally, more on backing up the GPG keys. It could be argued that keeping your master key on a smartcard might be a bad idea. After all, if the smartcard is lost, while it would be difficult to get the key out of the smartcard, you would probably want to treat it as compromised and get the key revoked. The same applies to keys kept on USB drives or on CD. A strong passphrase will help, but you still lost control of your key and at that point, no longer know whether it is still safe.
What's more, USB drives and CDs tend to eventually fail. CDs rot after a number of years, and USB drives just seem to not want to work correctly when you really need them. Paper is another option for backing up your keys, since there are ways (paperkey, for instance) to represent the data in a way that it could either be retyped or scanned back into digital data to be retrieved. Further securing a backup key could involve using gfshare to split it into multiple bits, in the hope that while one of its locations could be compromised (lost), you'll still have some of the others sufficient to reconstruct the key.
With the subkeys on the Yubikey, and provided gpg2 --card-status reports your card as detected, if you have the gpg-agent running with SSH support enabled you should be able to just run:
ssh-add -l
And have it list your card serial number. You can then use ssh-add -L to get the public key to use to add to authorized_keys files to use your authentication GPG subkey as a SSH key. If it doesn't work, make sure the gpg-agent is running and that ssh-add uses the right socket, and make sure pcscd isn't interfering (it seemed to get stuck in a weird state, and not shutting down automatically as it should after dealing with a request).
Whenever you try to use one of the subkeys (or the master key), rather than being asked for the passphrase for the key (which you should have set as a very difficult, absolutely unguessable string that you and only you could remember and think of), you will be asked to enter the User PIN set for the smartcard.
You've achieved proper two-factor authentication.
Note of ECC on the Yubikey: according to the marketing documentation, the Yubikey knows about ECC p256 and ECC p384. Unfortunately, it looks like safecurves.cr.yp.to considers these unsafe, since they do not meet all the SafeCurves requirements. I'm not especially versed in cryptography, but this means I'll read up more on the subject, and stay away from the ECC implementation on the Yubikey 4 for now. However, it doesn't seem, at first glace, that this ECC implementation is meant for GPG at all. The Yubikey also has PIV magic which would allow it to be used as a pure SSH smartcard (rather than using a GPG authentication subkey for SSH), with a private certificate being generated by the card. These certificates could be created using RSA or ECC. I tried to play a bit with it (using RSA), following the SSH with PIV and PKCS11 document on developers.yubico.com; but I didn't manage to make it work. It looks like the GPG functions might interfere with PIV in some way or I could just not handle the ssh-agent the right way. I'm happy to be shown how to use this correctly.
Sunday, 29 March 2015
Preseeding installations
In early February, I completed a move from Canonical's Phonedations team to the Foundations team. Part of this new work means debugging a lot of different failure cases in the installer, grub, and other early boot or low-level sofware, some of which requiring careful reproduction steps and probably quite a few install runs in VMs on on hardware.
Given the number of installations I do I've started to keep around preseed files; the text files used to configure automatic installations. I've made them available at http://people.canonical.com/~mtrudel/preseed/ so that they can be reused as necessary. Most of these preseed files make heavy use of the network to get the installation data and packages from the web, so they will need to be tweaked for use in an isolated network. They are annotated enough that it should be possible for anyone to improve on them to suit their own needs. I will add to these files as I run across things to test and automate. I hope we can use some of them soon in new automated QA tests where appropriate, so that it can help catch regressions.
For those not familiar with preseeding, these files can be used and referred to in the installation command-line when starting from a network PXE boot or a CDROM or pretty much any other installation medium. They are useful to tell the installer how you want the installation to be done without having to answer all of the individual questions one by one in the forms in ubiquity or debian-installer. The installer will read the preseed file and use these answers without showing the prompts. This also means some of the files I make available should not be used lightly, as they will happily wipe disks without asking. You've been warned :)
To use this, you'll want to specify "preseed/file=/path/to/file" (or just file=) for a file directly accessible as a file system or through TFTP, or "preseed/url=http://URI/to/file" (or just url=) if it's available using HTTP. On d-i installs, this means you may also need to add "auto=true priority=critical" to avoid having to fill in language settings and the like (since the preseeds are typically only read after language, country, and network have been configured); and on ubiquity installs (for example, using a CD), you'll want to add 'only-ubiquity automatic-ubiquity' to the kernel command-line, again to keep the automated, minimal look and feel.
I plan on writing another entry soon on how to debug early boot issues in VMs or hardware using serial. Stay tuned.
Given the number of installations I do I've started to keep around preseed files; the text files used to configure automatic installations. I've made them available at http://people.canonical.com/~mtrudel/preseed/ so that they can be reused as necessary. Most of these preseed files make heavy use of the network to get the installation data and packages from the web, so they will need to be tweaked for use in an isolated network. They are annotated enough that it should be possible for anyone to improve on them to suit their own needs. I will add to these files as I run across things to test and automate. I hope we can use some of them soon in new automated QA tests where appropriate, so that it can help catch regressions.
For those not familiar with preseeding, these files can be used and referred to in the installation command-line when starting from a network PXE boot or a CDROM or pretty much any other installation medium. They are useful to tell the installer how you want the installation to be done without having to answer all of the individual questions one by one in the forms in ubiquity or debian-installer. The installer will read the preseed file and use these answers without showing the prompts. This also means some of the files I make available should not be used lightly, as they will happily wipe disks without asking. You've been warned :)
To use this, you'll want to specify "preseed/file=/path/to/file" (or just file=) for a file directly accessible as a file system or through TFTP, or "preseed/url=http://URI/to/file" (or just url=) if it's available using HTTP. On d-i installs, this means you may also need to add "auto=true priority=critical" to avoid having to fill in language settings and the like (since the preseeds are typically only read after language, country, and network have been configured); and on ubiquity installs (for example, using a CD), you'll want to add 'only-ubiquity automatic-ubiquity' to the kernel command-line, again to keep the automated, minimal look and feel.
I plan on writing another entry soon on how to debug early boot issues in VMs or hardware using serial. Stay tuned.
Tuesday, 21 January 2014
Call for testing: urfkill / Getting flight mode to rock on Ubuntu and Ubuntu Touch
Last month, I blogged about urfkill, and what it's meant to be used for.
The truth is, flight mode and proper killswitch (read: disabling radios on devices) handling is something that needs to happen on any device that deems itself "mobile". As such, it's one thing we need to look into for Ubuntu Touch.
I spent the last month or so working on improving urfkill. I've implemented better logging, a way to get debugging logs, flight mode (with patches from my friend Tony Espy), persistence, ...
At this point, urfkill seems to be in the proper state to make it, with the latest changes from the upstream git repository, into the distro. There is no formal release yet, but this is likely to happen very soon. So, I uploaded a git snapshot from the urfkill upstream repository into Trusty. It's now time to ask people to try it out, see how well it works on their systems, and just generally get to know how solid it is, and whether it's time to enable it on the desktop.
In time, it would be nice to replace the current implementation we have of killswitch persistence (saving and restoring the state of the "soft" killswitches) currently in two upstart jobs — rfkill-store and rfkill-restore — with urfkill as a first step, for the 14.04 release (and to handle flight mode on Touch, of course). In the end, my goal would be to achieve convergence on this particular aspect of the operating system sooner than later, since it's a relatively small part of the overall communications/networking picture.
So I call on everyone running Trusty to try to install the urfkill package, and file bugs or otherwise get me feedback on the software. :)
The truth is, flight mode and proper killswitch (read: disabling radios on devices) handling is something that needs to happen on any device that deems itself "mobile". As such, it's one thing we need to look into for Ubuntu Touch.
I spent the last month or so working on improving urfkill. I've implemented better logging, a way to get debugging logs, flight mode (with patches from my friend Tony Espy), persistence, ...
At this point, urfkill seems to be in the proper state to make it, with the latest changes from the upstream git repository, into the distro. There is no formal release yet, but this is likely to happen very soon. So, I uploaded a git snapshot from the urfkill upstream repository into Trusty. It's now time to ask people to try it out, see how well it works on their systems, and just generally get to know how solid it is, and whether it's time to enable it on the desktop.
In time, it would be nice to replace the current implementation we have of killswitch persistence (saving and restoring the state of the "soft" killswitches) currently in two upstart jobs — rfkill-store and rfkill-restore — with urfkill as a first step, for the 14.04 release (and to handle flight mode on Touch, of course). In the end, my goal would be to achieve convergence on this particular aspect of the operating system sooner than later, since it's a relatively small part of the overall communications/networking picture.
So I call on everyone running Trusty to try to install the urfkill package, and file bugs or otherwise get me feedback on the software. :)
Friday, 13 December 2013
urfkill : a daemon to centrally control RF killswitches
Here's another project of the u-daemon variety. The latest addition to upower, udev, etc. Meet urfkill.
urfkill is meant to be a daemon that centralizes killswitch handling, rather than having all kind of different applications and daemon handle Wi-Fi, Bluetooth, WWAN and whatnot separately, and potentially fighting over them, you can have just one system that tracks the states and makes it possible to switch just one type of killswitch on all at one, or turn everything off should you so desire...
One reason I've taken an interest in urfkill in Ubuntu is that as we build a phone, we have to keep thinking about how users of the devices will be mobile. That's even more the case when you think about a phone or tablet than a laptop: on a laptop, you may have to think of WiFi and Bluetooth, but you're just about as likely to have your laptop off or not have it at all; whereas phones and tablets have become ubiquitous in our way of life.
Like anyone, thinking mobile I'd first think of walking around, driving, or other methods of travel. Granted, nobody needs to turn off Wi-Fi when getting in their car, but what about on planes?
This is the first thing everything brings up when talking about killswitches. Planes. Alright, you really do need to turn the device off on take off and landing, but some airlines do now allow wifi to be on and offer in-flight service. They still require you to keep cellular and bluetooth off. Also, while I sometimes do take my laptop out of my bag on long flights, it's just cramped. Space is at a premium on a flight (hey, I fly economy...), you'll likely want to have a drink, people besides you may need to get up, spillage could occur if there is turbulence...
I don't really enjoy using my laptop on a flight, even though it's quite small. It's just so much trouble and not very comfortable.
However, I do love to watch saved movies, listen to music, and play games on a tablet. That tablet will most likely need to have radios turned off. My phone will typically just stay off and stowed far enough, since I don't really change SIM cards until I can do so safely without risking to lose the thing.
But then, one can also think of how you should avoid using transmitting equipment in a hospital. They have similar rules about radios as planes to avoid interfering with cardiac stimulators, MRI equipment, etc.
Having all kind of different applications handle each type of killswitches separately is quite risky and complicated. How are you certain that things have been turned off? How do you check in the UI whether it's the case? Can you see it quickly by scanning the screen?
What about the actual process of switching things off? Do you need to go through three different interfaces to toggle everything? What do you need to do if you don't have a physical switch to use?
What about persistence after a reboot?
urfkill is meant to, in time, address all such questions. At the moment, it still needs a lot of work though.
I've spent the last day fixing bugs I could find while testing urfkill on my laptop, as well as porting it to logind (still in progress). In time, we should be able to use it efficiently in Ubuntu to handle all the killswitches. With some more work, we will also be able to use it to manage the modem and other systems on Touch.
For the time being, urfkill is available in the archive, for those who want to start experimenting with it.
urfkill is meant to be a daemon that centralizes killswitch handling, rather than having all kind of different applications and daemon handle Wi-Fi, Bluetooth, WWAN and whatnot separately, and potentially fighting over them, you can have just one system that tracks the states and makes it possible to switch just one type of killswitch on all at one, or turn everything off should you so desire...
One reason I've taken an interest in urfkill in Ubuntu is that as we build a phone, we have to keep thinking about how users of the devices will be mobile. That's even more the case when you think about a phone or tablet than a laptop: on a laptop, you may have to think of WiFi and Bluetooth, but you're just about as likely to have your laptop off or not have it at all; whereas phones and tablets have become ubiquitous in our way of life.
Like anyone, thinking mobile I'd first think of walking around, driving, or other methods of travel. Granted, nobody needs to turn off Wi-Fi when getting in their car, but what about on planes?
This is the first thing everything brings up when talking about killswitches. Planes. Alright, you really do need to turn the device off on take off and landing, but some airlines do now allow wifi to be on and offer in-flight service. They still require you to keep cellular and bluetooth off. Also, while I sometimes do take my laptop out of my bag on long flights, it's just cramped. Space is at a premium on a flight (hey, I fly economy...), you'll likely want to have a drink, people besides you may need to get up, spillage could occur if there is turbulence...
I don't really enjoy using my laptop on a flight, even though it's quite small. It's just so much trouble and not very comfortable.
However, I do love to watch saved movies, listen to music, and play games on a tablet. That tablet will most likely need to have radios turned off. My phone will typically just stay off and stowed far enough, since I don't really change SIM cards until I can do so safely without risking to lose the thing.
But then, one can also think of how you should avoid using transmitting equipment in a hospital. They have similar rules about radios as planes to avoid interfering with cardiac stimulators, MRI equipment, etc.
Having all kind of different applications handle each type of killswitches separately is quite risky and complicated. How are you certain that things have been turned off? How do you check in the UI whether it's the case? Can you see it quickly by scanning the screen?
What about the actual process of switching things off? Do you need to go through three different interfaces to toggle everything? What do you need to do if you don't have a physical switch to use?
What about persistence after a reboot?
urfkill is meant to, in time, address all such questions. At the moment, it still needs a lot of work though.
I've spent the last day fixing bugs I could find while testing urfkill on my laptop, as well as porting it to logind (still in progress). In time, we should be able to use it efficiently in Ubuntu to handle all the killswitches. With some more work, we will also be able to use it to manage the modem and other systems on Touch.
For the time being, urfkill is available in the archive, for those who want to start experimenting with it.
Tuesday, 29 October 2013
Hacking with a Samsung ARM Chromebook on Trusty
So I decided it was about time to update / reinstall my Samsung Chromebook (the ARM one...) to Trusty, or at least to use Saucy. Turns out it's not that simple.
First, you need to know where to get the right stuff. I installed straight on the device, so chrUbuntu was the obvious choice. It's a pretty nice script that allows you to do just about anything necessary.
1) Bring your Chromebook to developer mode.
I'm not going to give the details. It's findable on the Internet, and unsafe enough that you should only do this if you know what you're doing... That counts double for running Trusty on the Samsung Chromebook.
From there, get into crosh (Ctrl+Alt+T), in shell mode (type shell at the crosh prompt).
2) Download the script:
3) Run the script:
This will do the gory install step, partition your device and format the new partition, download the ubuntu core tarball, and from there install the metapackage you've asked for as a first argument.
Be aware that if you have never repartitioned the device, you'll likely notice the system rebooting during the process -- if that happens, just re-run the same command to pick this back up where they ended. It's clear when the process is done and the system installed -- the script requires you to press Enter to reboot.
This was where things got fun.
Turns out my device booted fine into Trusty, but it would only show a black screen with the mouse cursor. If you moved the mouse, you could see the cursor changing but still nothing else. Switching to another VT (Ctrl-Alt-arrow (F1) or whatnot) would work to get you a text-mode login, but only if you switched early enough while X was getting ready to load... otherwise, you'd just get a pretty garbled display.
I hacked at the whole thing for a good while. I already know xf86-video-armsoc was involved in ChromeOS at some point, so I tried to install that.
Still no love. Tried to copy the libs from ChromeOS to the device, in case it was some libmali or EGL/GLES issue... Still nothing better.
I even touched /etc/X11/xorg.conf with some black magic, looking up the details using w3m in a text console...
Turns out the problem was with xf86-video-armsoc itself. I initially clued in when I looked at the dates for upload of the X packages and xf86-video-armsoc itself -- it didn't seem quite right: X was newer by a bit. I knew there could be some issue with the ABI in some cases; but after more careful investigation, that's probably fine too -- armsoc properly depends on -abi-14.
After much more work and trial and error, I updated xf86-video-armsoc to 0.6.0 from the Linaro git tree and also reverted one commit changing flags and it's not mostly working. X runs, I get lightdm, I can run apps -- "compositing" in Xubuntu works too, to get transparency and gradients... all with some minimal display corruption of the window decorations.
So the end of the line is -- if you want to run Trusty on your Chromebook and run into similar black screen issues, and you feel daring, feel free to try my newly-built xf86-video-armsoc package in my PPA:
https://launchpad.net/~mathieu-tl/+archive/ppa/+sourcepub/3627079/+listing-archive-extra
It's simple; once you're in a text console on the machine (login as user/user):
These updated packages, or at least some kind of permanent fix, should make it into Trusty soon. Stay tuned :)
First, you need to know where to get the right stuff. I installed straight on the device, so chrUbuntu was the obvious choice. It's a pretty nice script that allows you to do just about anything necessary.
1) Bring your Chromebook to developer mode.
I'm not going to give the details. It's findable on the Internet, and unsafe enough that you should only do this if you know what you're doing... That counts double for running Trusty on the Samsung Chromebook.
From there, get into crosh (Ctrl+Alt+T), in shell mode (type shell at the crosh prompt).
2) Download the script:
cd ~/Downloads
wget http://goo.gl/s9ryd
3) Run the script:
sudo bash s9ryd xubuntu-desktop dev
This will do the gory install step, partition your device and format the new partition, download the ubuntu core tarball, and from there install the metapackage you've asked for as a first argument.
Be aware that if you have never repartitioned the device, you'll likely notice the system rebooting during the process -- if that happens, just re-run the same command to pick this back up where they ended. It's clear when the process is done and the system installed -- the script requires you to press Enter to reboot.
This was where things got fun.
Turns out my device booted fine into Trusty, but it would only show a black screen with the mouse cursor. If you moved the mouse, you could see the cursor changing but still nothing else. Switching to another VT (Ctrl-Alt-arrow (F1) or whatnot) would work to get you a text-mode login, but only if you switched early enough while X was getting ready to load... otherwise, you'd just get a pretty garbled display.
I hacked at the whole thing for a good while. I already know xf86-video-armsoc was involved in ChromeOS at some point, so I tried to install that.
Still no love. Tried to copy the libs from ChromeOS to the device, in case it was some libmali or EGL/GLES issue... Still nothing better.
I even touched /etc/X11/xorg.conf with some black magic, looking up the details using w3m in a text console...
Turns out the problem was with xf86-video-armsoc itself. I initially clued in when I looked at the dates for upload of the X packages and xf86-video-armsoc itself -- it didn't seem quite right: X was newer by a bit. I knew there could be some issue with the ABI in some cases; but after more careful investigation, that's probably fine too -- armsoc properly depends on -abi-14.
After much more work and trial and error, I updated xf86-video-armsoc to 0.6.0 from the Linaro git tree and also reverted one commit changing flags and it's not mostly working. X runs, I get lightdm, I can run apps -- "compositing" in Xubuntu works too, to get transparency and gradients... all with some minimal display corruption of the window decorations.
So the end of the line is -- if you want to run Trusty on your Chromebook and run into similar black screen issues, and you feel daring, feel free to try my newly-built xf86-video-armsoc package in my PPA:
https://launchpad.net/~mathieu-tl/+archive/ppa/+sourcepub/3627079/+listing-archive-extra
It's simple; once you're in a text console on the machine (login as user/user):
nmcli dev wifi connect <your wifi network> password <your wifi password>
sudo add-apt-repository ppa:mathieu-tl/ppa
sudo apt-get update
sudo apt-get install xserver-xorg-video-armsoc-exynos
sudo reboot
These updated packages, or at least some kind of permanent fix, should make it into Trusty soon. Stay tuned :)
Thursday, 24 March 2011
Idea #27250: Auto eth0 isn't very user friendly. Many people wont know what it is.
The Problem
In case you didn't already figure it out, the title refers to a quite popular idea on Ubuntu Brainstorm. It also refers to a bug report against NetworkManager in Launchpad: bug #386900.
This is one issue I'd particularly like to solve soon. Although it most likely won't change for Natty (given that we're in Feature Freeze, and UI Freeze incessantly), I believe the question truly can be brought to a concensus and fixed early in the Oneiric cycle (and actually be made available upstream for everyone's benefit).
I think much of the issues coming from this bug report stem from diverging expectations of people who just care about their wired connection working and likely don't need to change it all that often, and people who actively use NetworkManager's connection profiles to achieve various things.
First, some background:
Why "Auto eth0" ?
The name "Auto eth0" comes from... well, the fact that it's a connection that was created automatically by NetworkManager with the simplest default settings (that is, just use DHCP to set an IP address), and the fact that it was created for the interface eth0. As such, people with multiple wired network cards would then get one "Auto XXXX" profile for each wired card. This profile should take care of 90% of all use cases, since most people will just want their system to be plugged in, their home router to hand over an IP address and be able to get online.
What's this with profiles ?
I just mentioned that the connection names shown are profiles. This is actually very important to me and quite a lot of people, because there are often cases where one would want to use specific network settings when at work and while at home. In other words, one could use "Auto eth0" at home with a simple setup, and benefit from a "At work" profile which sets a static IP address, or different DNS search strings (what would let your computer access "planet", instead of "planet.ubuntu.com" in Firefox, for instance).
Why so many issues ?
I guess this all falls apart when you consider that most people probably won't use alternate profiles for wired connections. DHCP tends to get most things right from the start, which make profiles not very useful unless you want to do very specific things with your connection.
Add to this the fact that not everyone knows that eth0 is what Linux calls your first wired network card (instead of say "Local Area Connection" as I believe it is on Windows), and you have a nice little mess to untangle.
Fixing all of this
I can't say I have all the answers. It's still unclear to me how much information is absolutely required, and I'm well aware that we can't really please everyone.
However, I've added a proposal to the brainstorm idea (Solution #7). It goes like this:
Lastly, drop the "Auto" from user-created wireless network profiles too. Since they are created by the user and carry the name of the wireless network, "Auto" is both unnecessary, and possibly incorrect (since people can change the settings after creating it).
I'd very much like anyone with an opinion on this to vote on Ubuntu Brainstorm for the idea they prefer, and comment with why my suggestion breaks things for them if it does. I certainly could have forgotten things. Comments on this blog are welcome too ;)
In case you didn't already figure it out, the title refers to a quite popular idea on Ubuntu Brainstorm. It also refers to a bug report against NetworkManager in Launchpad: bug #386900.
This is one issue I'd particularly like to solve soon. Although it most likely won't change for Natty (given that we're in Feature Freeze, and UI Freeze incessantly), I believe the question truly can be brought to a concensus and fixed early in the Oneiric cycle (and actually be made available upstream for everyone's benefit).
I think much of the issues coming from this bug report stem from diverging expectations of people who just care about their wired connection working and likely don't need to change it all that often, and people who actively use NetworkManager's connection profiles to achieve various things.
First, some background:
Why "Auto eth0" ?
The name "Auto eth0" comes from... well, the fact that it's a connection that was created automatically by NetworkManager with the simplest default settings (that is, just use DHCP to set an IP address), and the fact that it was created for the interface eth0. As such, people with multiple wired network cards would then get one "Auto XXXX" profile for each wired card. This profile should take care of 90% of all use cases, since most people will just want their system to be plugged in, their home router to hand over an IP address and be able to get online.
What's this with profiles ?
I just mentioned that the connection names shown are profiles. This is actually very important to me and quite a lot of people, because there are often cases where one would want to use specific network settings when at work and while at home. In other words, one could use "Auto eth0" at home with a simple setup, and benefit from a "At work" profile which sets a static IP address, or different DNS search strings (what would let your computer access "planet", instead of "planet.ubuntu.com" in Firefox, for instance).
Why so many issues ?
I guess this all falls apart when you consider that most people probably won't use alternate profiles for wired connections. DHCP tends to get most things right from the start, which make profiles not very useful unless you want to do very specific things with your connection.
Add to this the fact that not everyone knows that eth0 is what Linux calls your first wired network card (instead of say "Local Area Connection" as I believe it is on Windows), and you have a nice little mess to untangle.
Fixing all of this
I can't say I have all the answers. It's still unclear to me how much information is absolutely required, and I'm well aware that we can't really please everyone.
However, I've added a proposal to the brainstorm idea (Solution #7). It goes like this:
I'm suggesting the name of the profile to be something like "Default". It should not be tied to any particular adapter.Furthermore, perhaps items in the network menu shouldn't list the full details of the network card (it's full name from udev as it does now). Instead, the interface name would be sufficient. I expect people who use multiple cards to know what eth0 and eth1 mean and refer to.
This way, any new connection use that profile which will have default settings to use DHCP and the usual (as Auto eth0 is set). All adapters could share it, so adding a new interface to a computer would still just "work".
For notifications, I suggest the following changes:
- The title should mention "Wired network", and probably the same of the interface (eth0 in most cases).
- The text of the notification should say:
Connection established, using profile "Default"
or whatever profile in use.
Lastly, drop the "Auto" from user-created wireless network profiles too. Since they are created by the user and carry the name of the wireless network, "Auto" is both unnecessary, and possibly incorrect (since people can change the settings after creating it).
I'd very much like anyone with an opinion on this to vote on Ubuntu Brainstorm for the idea they prefer, and comment with why my suggestion breaks things for them if it does. I certainly could have forgotten things. Comments on this blog are welcome too ;)
Wednesday, 9 March 2011
This weekend's GeekFest in Montreal
We had a table at this weekend's GeekFest geek festival in Montreal. It was awesome! Tons of people, and even better, tons of interest about Ubuntu and our LoCo team.
We gave out CDs, stickers, some extra FSF stickers I had in my backpack, and generally told people all they wanted to know about Ubuntu, gaming on Ubuntu (we had a demo of World of Goo running on one of the laptops for a good part of Sunday), and the Ubuntu Quebec LoCo team. It was very interesting to hear people tell us they already knew about Ubuntu or used it at home, at work, etc; yet still didn't know about the local community team and the help resources we offer.
One of the things we focused on was how Ubuntu Quebec has a mailing list and forum to provide help, announce events and just generally discuss things, as well as our IRC channel on Freenode (#ubuntu-qc, for those who don't know!). Lots of people were surprised to hear of a user group for Ubuntu but very interested by it. I printed and gave out nearly 40 business cards with contact information for the LoCo team.
I am very happy to have been helped by two very active members of the team: Christian Parent (Mobidoy) and Philippe Gauthier (deuxpi), and joined on Sunday by Eric Beaurivage (sipherdee), another LoCo team member. Without them, we certainly couldn't have been able to speak to so many people, and we definitely wouldn't have had any time to visit the other kiosks (can't just stay sitting... if you hold a kiosk in a conference, just got to go see the other things!).
Christian always has very cool ideas, this weekend it was to show his new laptop sticker (a mouse pad glued to the laptop).
Some other interesting aspects:
To our right was the kiosk of devLAB, a project to start programming contests, identify new technologies, etc... Did I get this all right? Sure hope so. The great thing too is that they were interested by our Global Jam ideas, so there may be collaboration on that aspect to come for this cycle's Global Jam event in Montreal. That still needs to be discussed on the mailing list.
We met with someone from Foonzo Café, a new café in Montreal near Peel metro which runs all their systems on Ubuntu! They have some 80 seated places, so we may consider holding the Montreal release party there for Natty. Check how the discussion unfolds for this on our mailing list.
 And last but not least, we met with Carlos and his brother who started "Carlito's Contraptions". They work on Nao the robot to develop applications, have it do stuff... While Nao doesn't exactly run Ubuntu (it's really a stripped down Linux with the bare minimum), their development systems are Ubuntu. They were nice enough to allow us to take action shots of Nao with a Ubuntu logo sticker. First it was on a GeekFest pin attached to Nao with sticky-tack, then they put another sticker directly on Nao's right arm. Rock on guys!
Take a look at all the pictures on my Picasa Album: "GeekFestMtl 2011".
We gave out CDs, stickers, some extra FSF stickers I had in my backpack, and generally told people all they wanted to know about Ubuntu, gaming on Ubuntu (we had a demo of World of Goo running on one of the laptops for a good part of Sunday), and the Ubuntu Quebec LoCo team. It was very interesting to hear people tell us they already knew about Ubuntu or used it at home, at work, etc; yet still didn't know about the local community team and the help resources we offer.
One of the things we focused on was how Ubuntu Quebec has a mailing list and forum to provide help, announce events and just generally discuss things, as well as our IRC channel on Freenode (#ubuntu-qc, for those who don't know!). Lots of people were surprised to hear of a user group for Ubuntu but very interested by it. I printed and gave out nearly 40 business cards with contact information for the LoCo team.
I am very happy to have been helped by two very active members of the team: Christian Parent (Mobidoy) and Philippe Gauthier (deuxpi), and joined on Sunday by Eric Beaurivage (sipherdee), another LoCo team member. Without them, we certainly couldn't have been able to speak to so many people, and we definitely wouldn't have had any time to visit the other kiosks (can't just stay sitting... if you hold a kiosk in a conference, just got to go see the other things!).
Christian always has very cool ideas, this weekend it was to show his new laptop sticker (a mouse pad glued to the laptop).
Some other interesting aspects:
To our right was the kiosk of devLAB, a project to start programming contests, identify new technologies, etc... Did I get this all right? Sure hope so. The great thing too is that they were interested by our Global Jam ideas, so there may be collaboration on that aspect to come for this cycle's Global Jam event in Montreal. That still needs to be discussed on the mailing list.
We met with someone from Foonzo Café, a new café in Montreal near Peel metro which runs all their systems on Ubuntu! They have some 80 seated places, so we may consider holding the Montreal release party there for Natty. Check how the discussion unfolds for this on our mailing list.

Take a look at all the pictures on my Picasa Album: "GeekFestMtl 2011".
Friday, 10 September 2010
Broadcom driver now open source
This has been brought to my attention today. I see this as a huge win for Ubuntu, since, let's face it, Broadcom devices are a large part of the WiFi device ecosystem. I'm happy to see Broadcom finally publishing some of their source code, and through this helping out Linux users of all distributions get better working WiFi. I see this as a win for Ubuntu in general because it will always make me happier to see people having fewer issues with wireless devices. This also translates to less wheel-spinning with broken drivers we could not possibly fix (since they are closed source), towards more productive work on other aspects of Ubuntu... or just a better chance of fixing driver issues :)
Of course, this is a work in progress and not all Broadcom devices are currently supported by this driver, but I believe that in due time, Broadcom could become one of the golden examples we can give to hardware manufacturers on how to provide the best kind of support they can to the Linux community.
Read more about this on Slashdot, OSNews, or read the annoucement on the Linux Wireless mailing list.
Thanks Broadcom!
Of course, this is a work in progress and not all Broadcom devices are currently supported by this driver, but I believe that in due time, Broadcom could become one of the golden examples we can give to hardware manufacturers on how to provide the best kind of support they can to the Linux community.
Read more about this on Slashdot, OSNews, or read the annoucement on the Linux Wireless mailing list.
Thanks Broadcom!
Tuesday, 18 May 2010
If you're filing bugs: please don't be selfish!
<rant>
If you're filing bugs, I understand that you feel strongly about the issues you're seeing, and that you feel like your problem is important and deserves immediate attention. I also want "my" bugs to be dealt with as soon as possible, and as a Ubuntu contributor I also want *your* bugs to be fixed in a timely manner. However, you usually should not just add information to an existing bug because the symptoms are vaguely similar.
My point is, if you're seeing that something is wrong with your hardware (because this type of issue is quite frequent with hardware-related bugs), please don't hesitate to open a new bug. Developers will often be quite pleased that you did, and will be happy to mark something as a duplicate of another bug for you. Other bug reporters will also be happier, because it allows their own, often unrelated issue to be dealt with rapidly. Your own bug will also likely be fixed earlier, since developers need to sift through less information related to a specific issue: they then need to decide whether a specific attachment or comment is relevant in far fewer cases.
It just helps making the experience more enjoyable to everyone.
Also, if you're suggesting in a bug report against a specific package to use another package, you're not being helpful. Sure, you help the reporter by fixing their immediate problem, but you're not helping the underlying issues being resolved. What we want is to have all projects improve and squash their bugs, which cannot be done if you, say, suggest using Wicd in a bug against NetworkManager for a broken wifi driver.
I like both of these projects, I want both to succeed equally, which means that bugs need to be reported and respected so that we can fix the issues that arise and deliver a better user experience to everyone; while allowing all projects to grow and improve. This is what suggesting that project X is a failure (that's usually not the words used, but you get the idea), and that project Y is better (because it doesn't have that specific issue), will never achieve.
It all boils down to being nice to others. Nice to other bug reporters, because everyone has the same chance of getting their bugs fixed, and nice to other projects because they all get their share of bugs and success stories.
</rant>
If you're filing bugs, I understand that you feel strongly about the issues you're seeing, and that you feel like your problem is important and deserves immediate attention. I also want "my" bugs to be dealt with as soon as possible, and as a Ubuntu contributor I also want *your* bugs to be fixed in a timely manner. However, you usually should not just add information to an existing bug because the symptoms are vaguely similar.
My point is, if you're seeing that something is wrong with your hardware (because this type of issue is quite frequent with hardware-related bugs), please don't hesitate to open a new bug. Developers will often be quite pleased that you did, and will be happy to mark something as a duplicate of another bug for you. Other bug reporters will also be happier, because it allows their own, often unrelated issue to be dealt with rapidly. Your own bug will also likely be fixed earlier, since developers need to sift through less information related to a specific issue: they then need to decide whether a specific attachment or comment is relevant in far fewer cases.
It just helps making the experience more enjoyable to everyone.
Also, if you're suggesting in a bug report against a specific package to use another package, you're not being helpful. Sure, you help the reporter by fixing their immediate problem, but you're not helping the underlying issues being resolved. What we want is to have all projects improve and squash their bugs, which cannot be done if you, say, suggest using Wicd in a bug against NetworkManager for a broken wifi driver.
I like both of these projects, I want both to succeed equally, which means that bugs need to be reported and respected so that we can fix the issues that arise and deliver a better user experience to everyone; while allowing all projects to grow and improve. This is what suggesting that project X is a failure (that's usually not the words used, but you get the idea), and that project Y is better (because it doesn't have that specific issue), will never achieve.
It all boils down to being nice to others. Nice to other bug reporters, because everyone has the same chance of getting their bugs fixed, and nice to other projects because they all get their share of bugs and success stories.
</rant>
Monday, 22 March 2010
News about the Global Jam in Montreal
I'm amazed by the amount of interest we're gathering here in Montreal for the Global Jam and the new version Ubuntu in general. I'm very eager to put in lots of work on triaging and helping people understand how to create packages or prepare patches to packages, but I've been contacted by a few people and thought it would be good to share on the awesome presentations and presenters we'll be able to see here this weekend:
- A presentation MythTV and video capture, by Marc-André Gingras
- Club Capra / a robotics project that was migrated from Windows to Ubuntu, and how that was done, by Michael Faille
- An overview of PiTiVi and video edition, by Jeff Fortin (surely along with a bug jam blitz on PiTiVi?)
- A presentation on UbuntuStudio, JACK, and Ardour; by Ronan Jouchet
To get all the juicy details, check out https://wiki.ubuntu.com/QuebecTeam/GlobalJam10.03
I seriously can't wait until Friday!
Sunday, 7 March 2010
Global Jam à Montréal: on récidive!
Il me fait plaisir d'annoncer que la participation des utilisateurs Ubuntu montréalais au Ubuntu Global Jam se fera encore une fois, un peu avant la sortie officielle de Lucid Lynx (la version 10.04, présentement en développement), à l'École de Technologie Supérieure!
Les locaux ont été officialisés: du 26 au 28 mars, nous pourrons passer la fin de semaine dans les locaux de l'ETS, soit les salles de classe A-1300 et A-1238 (en haut des escaliers de l'entrée principale, puis à gauche). N'hésitez pas à consulter la page wiki QuebecTeam/GlobalJam pour l'horaire exact ainsi que les directions pour s'y rendre!
Un gros merci à l'administration de l'ETS pour bien vouloir supporter l'événement (et donc Ubuntu!), et à Clod Patry et Oleg Litvinski pour leur aide avec les détails administratifs.
Vous êtes donc invités à participer à des efforts d'identification, de tri et de "patchage" de bogues avec nous, ainsi qu'à venir poser des questions, essayer la nouvelle version "live" ou l'installer, ou même simplement essayer Ubuntu pour une première fois sur votre ordinateur, dans un environnement convivial où vous pourrez vous sentir bien à l'aise de demander de l'aide si vous en avez besoin... Où simplement venir rencontrez d'autres utilisateurs pour discuter de tout et de rien!
Quelques présentations devraient être planifiées d'ici fin mars. Entre autres, un élève de l'ETS, Michael Faille, nous fera la présentation d'un projet robotique réalisé pas un groupe de l'ETS et roulant sur Ubuntu (depuis sa migration de Windows!). On prévoit certainement encore présenter de façon survolée l'entrée de bogues dans Launchpad, ou alors le tri de ceux-ci si vous voulez aider les développeurs.
Cette fois-ci, beaucoup d'emphase sera mise sur le travail direct en équipe sur les différents bugs qui pourront avoir été soulevés. Il reste à déterminer la formule exacte, mais le but sera de démontrer l'intérêt de notre équipe dans la qualité de la distribution :)
D'ici là, il reste un tas de choses à planifier. Si vous voulez aider dans la réalisation de l'événement ou vous avez des idées, n'hésitez pas à en faire part sur la liste de distribution Ubuntu-QC ou sur notre canal sur Freenode: #ubuntu-qc.
L'École de Technologie Supérieure (ETS) est située au 100 rue Notre-Dame Ouest, soit à deux minutes du métro Bonaventure, au coin Notre-Dame et Peel.
Thursday, 10 December 2009
Starting my first book review
I read a lot, that's clearly not the problem -- although sometimes I wish it was fewer technical documents and more fiction...
It somewhat surprised me when I was contacted out of the blue by someone from Packt Publishing to ask me to review a new book on Cacti: Cacti 0.8 Network Monitoring, by Dinanhkur Kundu and S. M. Ibrahim Lavlu (ISBN 13: 978-1-847195-96-8).
I love Cacti, it's clearly one of those network monitoring tools that are both easy to implement and easy to configure, and does a terrific job at aggregating historical information on what happened on machines. I had it implemented on roughly 200 systems with sometimes easily 40 graphs per system (switches, firewalls, etc), and although speed can be an issue, it is one that can be easily solved with Spine.
Back to the book: at first glance, it looks well written. I can't speak for its physical aspect since Packt won't ship to Canada, but it seems clear and to the point, with a good amount of background information on SNMP, which is often just what someone will be lacking when first trying out monitoring and Cacti. I'll write of my final opinion after reading the book in full though ;)
If there's at least one very good point: anyone could start with just this and a Ubuntu or Debian system and very quickly get rolling, since it mentions all the prerequisites of a Cacti install and the basic tricks on how to deal with installing, patching, and upgrading Cacti.
Expect my full report on it in a later post!
Update: I forgot to mention you can also check out this free chapter excerpt: http://www.packtpub.com/files/5968-cacti-sample-chapter-4-creating-and-using-templates.pdf
It somewhat surprised me when I was contacted out of the blue by someone from Packt Publishing to ask me to review a new book on Cacti: Cacti 0.8 Network Monitoring, by Dinanhkur Kundu and S. M. Ibrahim Lavlu (ISBN 13: 978-1-847195-96-8).
I love Cacti, it's clearly one of those network monitoring tools that are both easy to implement and easy to configure, and does a terrific job at aggregating historical information on what happened on machines. I had it implemented on roughly 200 systems with sometimes easily 40 graphs per system (switches, firewalls, etc), and although speed can be an issue, it is one that can be easily solved with Spine.
Back to the book: at first glance, it looks well written. I can't speak for its physical aspect since Packt won't ship to Canada, but it seems clear and to the point, with a good amount of background information on SNMP, which is often just what someone will be lacking when first trying out monitoring and Cacti. I'll write of my final opinion after reading the book in full though ;)
If there's at least one very good point: anyone could start with just this and a Ubuntu or Debian system and very quickly get rolling, since it mentions all the prerequisites of a Cacti install and the basic tricks on how to deal with installing, patching, and upgrading Cacti.
Expect my full report on it in a later post!
Update: I forgot to mention you can also check out this free chapter excerpt: http://www.packtpub.com/files/5968-cacti-sample-chapter-4-creating-and-using-templates.pdf
Wednesday, 28 October 2009
Checklist announcement
I've been running EC2 AMI tests for a little while now, and it quickly became apparent
that many if not all of the tests could be automated and would then probably be much more
interesting to run -- that, and just the automation process is really interesting to work on.
At the moment, it's only a branch that I've registered in its own
project: lp:checklist. Its project page is here: https://edge.launchpad.net/checklist
You can get started using checklist by grabbing it from Bazaar (since there is no official
release yet):
It's possible that a lot of the work I've done could just as well have been included into other
tools, like checkbox, but for starters, I was mostly interested in getting some basic stuff to
work, and worrying about the other details later.
At this point, checklist is able to run commands over ssh, locally, and the most interesting
feature is that it can also create EC2 instances (using python-boto), which it would then ssh
onto to run a testcase.
Checklist also is all configured using an easy to use configuration file format: ini files. It
can look at the stdout and stderr of the commands run in order to check for success or failure
using regexes, which will give a fairly high level of control to someone writing special tests.
Thinking about it more, I'm also going to be using it to remotely verify machines that have been
kickstarted to make sure the unattended installs run properly and do everything required. The
fact that it can run tests on a remote machine is definitely a plus when trying to test
kickstarted systems from an isolated network.
Don't hesitate to branch checklist and provide me with patches :)
that many if not all of the tests could be automated and would then probably be much more
interesting to run -- that, and just the automation process is really interesting to work on.
At the moment, it's only a branch that I've registered in its own
project: lp:checklist. Its project page is here: https://edge.launchpad.net/checklist
You can get started using checklist by grabbing it from Bazaar (since there is no official
release yet):
bzr branch lp:checklist
It's possible that a lot of the work I've done could just as well have been included into other
tools, like checkbox, but for starters, I was mostly interested in getting some basic stuff to
work, and worrying about the other details later.
At this point, checklist is able to run commands over ssh, locally, and the most interesting
feature is that it can also create EC2 instances (using python-boto), which it would then ssh
onto to run a testcase.
Checklist also is all configured using an easy to use configuration file format: ini files. It
can look at the stdout and stderr of the commands run in order to check for success or failure
using regexes, which will give a fairly high level of control to someone writing special tests.
Thinking about it more, I'm also going to be using it to remotely verify machines that have been
kickstarted to make sure the unattended installs run properly and do everything required. The
fact that it can run tests on a remote machine is definitely a plus when trying to test
kickstarted systems from an isolated network.
Don't hesitate to branch checklist and provide me with patches :)
Wednesday, 14 October 2009
Debian/Ubuntu package for emerillon
Following the (very) recent release of emerillon 0.1.0, I'm pleased to announce that emerillon has a debian package created, and now available in my PPA for Emerillon:
If you use Ubuntu Karmic 9.10, almost all dependencies are already available... Except libethos.
For libethos, you will also need, for now, to add the PPA for audidude (Christian Hergert):
This is until I have the time to rebuild the packages for that library and publish them to my Emerillon PPA.
There's already work started to include it into Debian, but it still requires packages that aren't ready yet. Same idea for Ubuntu. One of the major blockers are libethos, but I will discuss its inclusion with the upstream maintainer (who is audidude, in any case), and hopefully get it included very soon. From then, emerillon should be fairly easy to upload to Debian.
For the curious, Emerillon is a map viewer for GNOME, very nicely designed, which uses OpenStreetMap maps to allow you to search, add placemarks, etc. Think of it as a Google Maps for your computer, but fully open :)
For more information about Emerillon, see the Launchpad project page: https://edge.launchpad.net/emerillon
Happy mapping!
https://edge.launchpad.net/~mathieu-tl/+archive/emerillon
If you use Ubuntu Karmic 9.10, almost all dependencies are already available... Except libethos.
For libethos, you will also need, for now, to add the PPA for audidude (Christian Hergert):
https://edge.launchpad.net/~audidude/+archive/ppa
This is until I have the time to rebuild the packages for that library and publish them to my Emerillon PPA.
There's already work started to include it into Debian, but it still requires packages that aren't ready yet. Same idea for Ubuntu. One of the major blockers are libethos, but I will discuss its inclusion with the upstream maintainer (who is audidude, in any case), and hopefully get it included very soon. From then, emerillon should be fairly easy to upload to Debian.
For the curious, Emerillon is a map viewer for GNOME, very nicely designed, which uses OpenStreetMap maps to allow you to search, add placemarks, etc. Think of it as a Google Maps for your computer, but fully open :)
For more information about Emerillon, see the Launchpad project page: https://edge.launchpad.net/emerillon
Happy mapping!
Subscribe to:
Posts (Atom)